Have you ever felt stuck when installing a newly bought pendant light? Or found after installation that the hanging height is incorrect, the light is glaring, or even potential safety hazards exist? In fact, installing pendant lights is not simply manual labor, but a technical task requiring scientific planning and careful attention to details. Master the practical tips below, and you will not only avoid rework, but also make your pendant light the stunning focal point of your home space!
I. Proper Placement: The Ideal Position for Pendant Lights
Center Alignment PrinciplePendant lights are generally installed directly in the center of living rooms and dining rooms to maintain visual balance. For spaces with special layouts such as kitchen islands and bar counters, position the fixture according to the center of each functional zone.
Height CalculationCeiling height determines the type of pendant light:
If your ceiling height is under 8.5 ft, recessed ceiling lights or short-chain pendant lights are recommended.
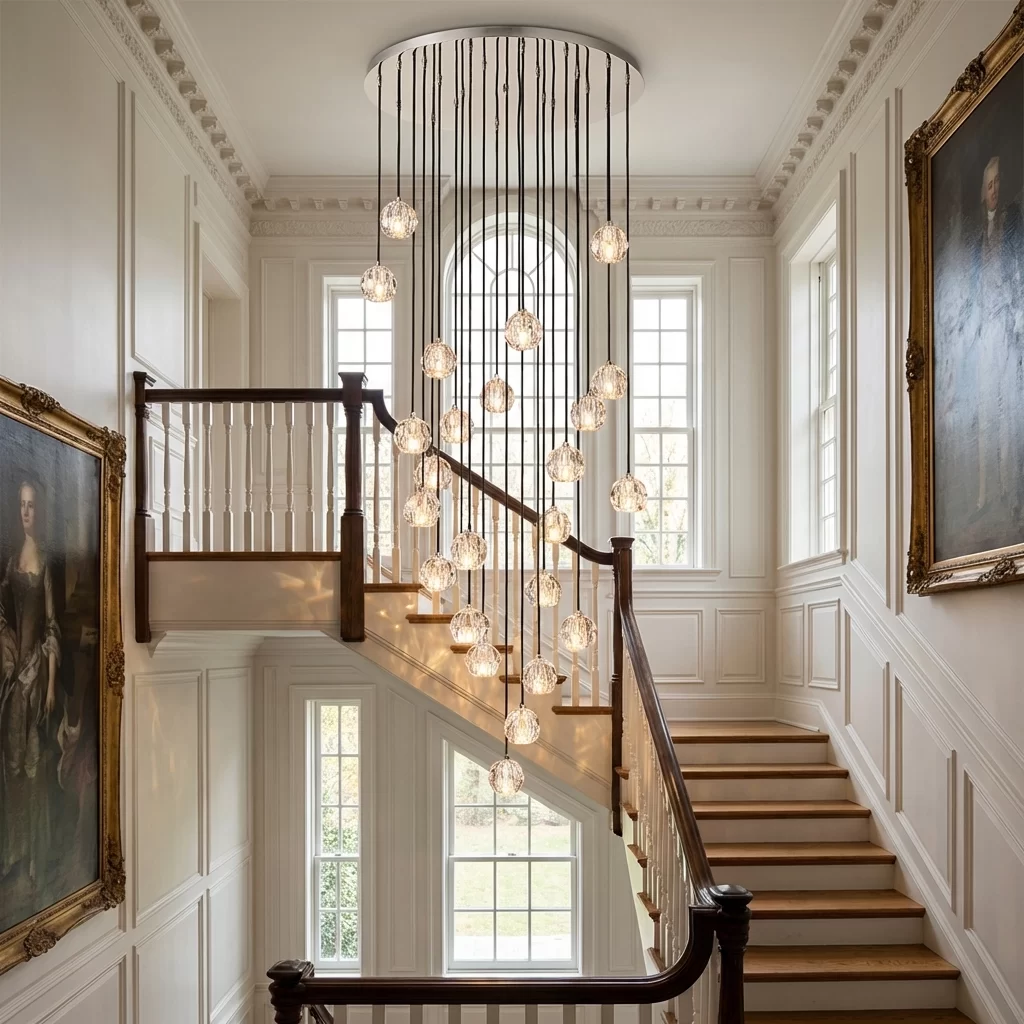
If your ceiling height is above 9.2 ft, you can freely choose long-chain pendants or crystal chandeliers.Recommended clearance heights:
For dining table pendants: The bottom of the light fixture should be 28–35 inches above the tabletop. This height prevents head bumps while concentrating light directly on the dining area.

For living room pendants: The fixture should hang at least 7.2 ft above the floor to avoid collisions when walking.

Avoid Obstructions

Check in advance for ceiling beams, plumbing pipes, and air conditioning vents on the ceiling. Improper installation will compromise functionality and interior aesthetics.
II. Tools & Materials: Full Preparation for Efficient Installation
Essential Tools: Electric drill, expansion bolts, screwdriver, electrical insulating tape, level, step ladder (or stable scaffolding).
Key Materials:
Hanging hooks / downrods: Choose heavy-duty metal materials such as stainless steel. The load capacity must be more than 3 times the total weight of the light fixture.

Electrical wires: Use American standard flame-retardant wires. Reserve 8–12 inches of extra wire length for easy wiring connections.

Insulating components: Wire nuts, insulating sleeves to eliminate electric leakage risks.
Important Reminder:
If the pendant light weighs over 11 lbs, you must install embedded anchor bolts or specialized heavy-duty hanging hooks. Never mount heavy fixtures directly onto drywall.
III. Installation Steps: Follow the Process, Prioritize Safety
Cut off all power supplyShut off the main circuit breaker. Use a voltage tester to confirm there is no electricity before beginning any work.

Mark and drill holesUse a level to mark the mounting spot on the ceiling to ensure the pendant light hangs perfectly vertical.Select a drill bit matching the expansion bolt size, and drill holes deeper than the length of the expansion bolts.

Secure the hanging hookInsert the expansion bolts and hammer them tightly in place. Screw on the hook and test its stability by pulling firmly by hand.For multi-light chandeliers, space all hooks evenly to keep the entire fixture well-balanced.

Wiring and fixture assemblyStrip approximately 0.4 inches of insulation off the wire ends. Connect the hot wire (black/brown), neutral wire (white/blue) to the corresponding terminals on the light, then wrap all connections securely with insulating tape.The equipment grounding wire (green/bare copper) must be firmly connected to prevent electric shock hazards.Assemble the lamp body, lampshade, bulbs, or LED strips step by step following the product manual. Do not apply excessive force to avoid damaging components.

Power-on testAfter wiring is complete, do not fully attach the lampshade yet. Restore power and check for normal illumination, flickering, or malfunctions. Once everything works properly, adjust the hanging angle of the light and fully tighten all fasteners.
IV. Common Mistakes to Avoid
Ignoring load-bearing capacity: Low-quality no-drill mounts may cause heavy lights (especially crystal chandeliers) to fall and cause injury.

Exposed wiring: Uninsulated wire joints create severe fire hazards.

Improper hanging height: Dining pendants too low lead to frequent head bumps; living room pendants too high cause scattered light and dull, cramped ambiance.

Mismatched interior style: Industrial pendants in European-style living rooms, or luxurious crystal chandeliers in minimalist bedrooms will ruin overall home decor harmony.
V. Advanced Tips to Upgrade Your Lighting Effect
Layered lighting design: Combine main pendant lights with auxiliary lighting such as wall sconces and floor lamps to create rich ambient light layers.

Smart lighting control: Install dimmable and color-adjustable smart bulbs, controllable via mobile apps or voice commands for customized lighting scenes.

Regular maintenance and cleaning: Dust the fixture with a feather duster or slightly damp cloth to prevent dust buildup from dimming brightness. For crystal chandeliers, use specialized crystal cleaner and let air-dry naturally.
Installing pendant lights is both a technical skill and a pursuit of refined daily living. Every step from early planning to detailed construction affects safety and aesthetics. With these tips, you can easily install practical, stylish high-end home lighting on your own.Next time you have a new pendant light to mount, you’ll be fully confident to get the job done yourself!